Have you ever stared at a pile of soggy lettuce at the bottom of your fridge drawer and felt a pang of guilt before tossing it in the trash? You are not alone. Food waste is a massive, quiet problem. On a global scale, roughly one-third of all food produced for human consumption goes to waste annually.¹ In the United States, between 30% and 40% of our food supply is thrown away. That makes food waste the single largest category of material filling up our landfills, taking up nearly a quarter of all municipal solid waste.
So what does this actually mean for the planet? When organic scraps rot in oxygen-starved landfills, they do not just disappear. They produce methane, a greenhouse gas that is up to 80 times more potent than carbon dioxide for trapping heat in our atmosphere.
But here is where your new superpower comes in. By setting up a simple home composting system, you can personally offset about 0.39 metric tons of carbon dioxide equivalent every single year. The federal government has set an ambitious goal to cut per capita food waste in half by 2030.² Composting is the easiest, most rewarding way to help reach that target right from your own kitchen.
Composting is simply the natural process of recycling organic material into a rich, dark soil conditioner. Gardeners call this "black gold" because it is packed with nutrients that help plants thrive. Instead of sending your trash to rot in a landfill, you are turning it into fuel for new life.
Setting Up Your Composting Station
Before you start saving every apple core, you need to decide where your compost is going to live. You do not need a massive backyard or a complicated setup to make this work.
If you have a yard, you can choose between a simple open pile or a structured bin. Open piles are great for large properties with plenty of yard waste, but they can look a bit messy. If you want to keep things tidy and keep pests away, a compost tumbler is an excellent choice. These are sealed, rotating drums that make it incredibly easy to turn and mix your compost.
What if you live in a small apartment? You can still compost. Vermicomposting uses specialized red wiggler worms to digest your food scraps inside a compact indoor bin. These worms thrive in normal indoor temperatures between 59 and 77 degrees Fahrenheit, quietly turning your kitchen waste into nutrient-dense casings without any odor.
Another indoor option is Bokashi, which is an anaerobic fermentation process. You use a special inoculated bran to ferment all your food waste, even meat and dairy, before burying it in the soil outside.
No matter which method you choose, location matters. If you are composting outdoors, find a flat, well-drained spot that gets partial shade. Too much direct sun will dry your pile out, while too much shade will keep it too cold and wet to break down efficiently.
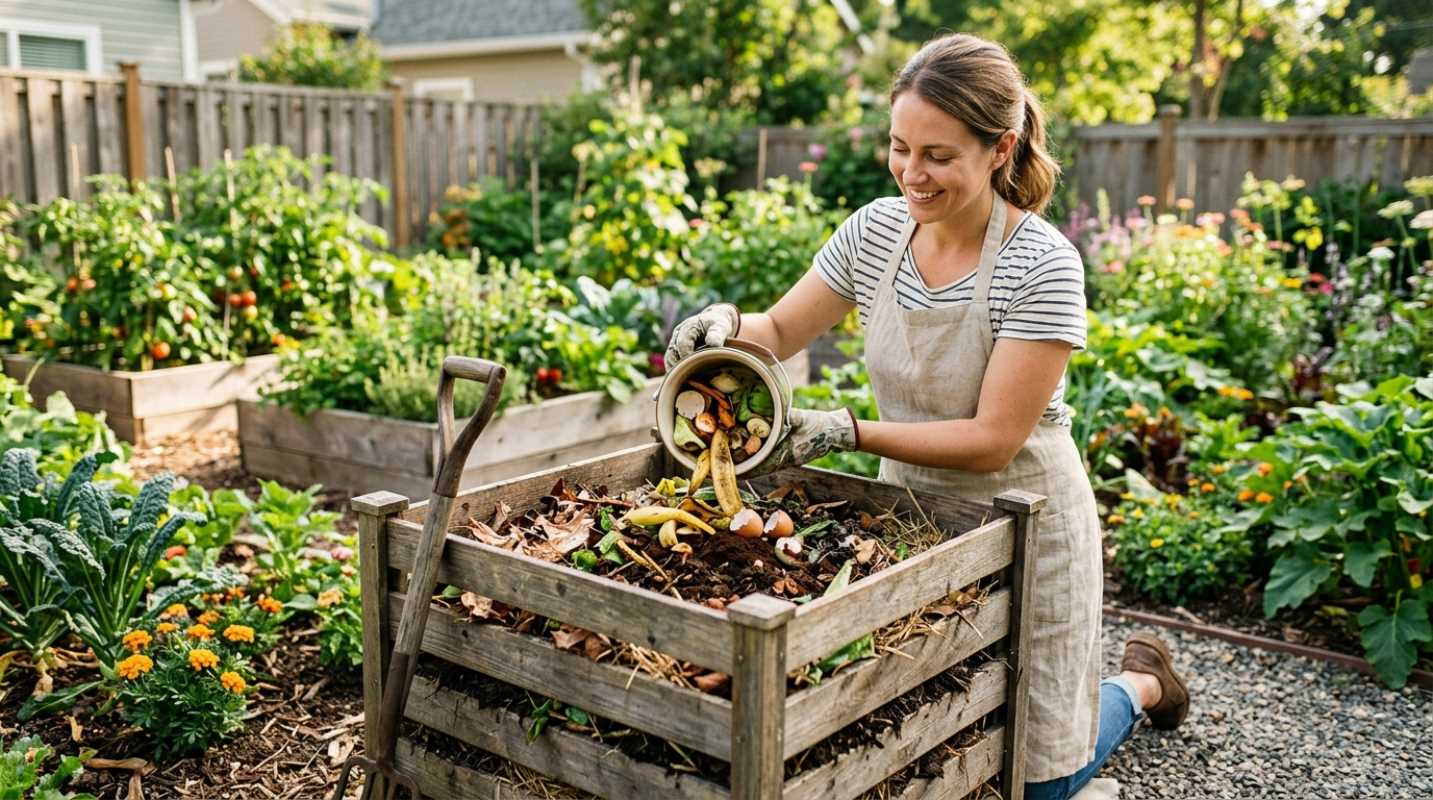
You do not need to spend a fortune on tools either. A simple pitchfork for turning, a backyard hose, and a small, lidded countertop bin to collect daily kitchen scraps are all you need to get started.
Choosing the right gear can make your composting journey much smoother. Here are some of the best tools and systems to help you get started.
The Golden Ratio of Greens and Browns
Composting is farming microbes. To keep these tiny organisms happy and working hard, you need to feed them the right balance of two basic ingredients, which composters call greens and browns.
Greens are your nitrogen-rich, wet materials. These provide the protein and energy that microorganisms need to grow and generate heat. Think of things like fruit and vegetable scraps, coffee grounds, tea leaves, and fresh grass clippings.
Browns are your carbon-rich, dry materials. They act as food for the microbes and create pockets of air in your pile so it can breathe. Excellent browns include dry leaves, straw, shredded cardboard, non-glossy newspaper, and wood chips.
To keep your pile healthy and completely odor-free, you want to aim for a simple volume ratio of two to three parts browns for every one part greens. Think of it like a lasagna. Every time you throw in a container of wet kitchen scraps, make sure to cover it with two or three times that amount of dry leaves or shredded cardboard.
The golden rule of home composting is to always finish your pile with a thick layer of browns on top. This dry layer acts as a natural biofilter. It traps odors inside the pile and stops pests like flies and rodents from sniffing out your fresh kitchen scraps.
What You Can and Absolutely Cannot Compost
Getting your ingredients right is the difference between a sweet-smelling pile of soil and a smelly neighborhood nuisance. Luckily, the rules are straightforward once you get the hang of them.
Let us look at what belongs in your compost bin. You can safely throw in almost any plant-based kitchen scrap.³
• Fruit and vegetable scraps, Apple cores, banana peels, and potato skins are perfect.
• Coffee grounds and paper filters. These are actually rich in nitrogen, despite their dark color.
• Yard trimmings, Dry leaves, twigs, and small branches help build the structure of your pile.
• Clean paper products, Shredded cardboard, and plain newspaper are great carbon sources.
Now, let us talk about what you must absolutely avoid. Some things will ruin your pile, attract pests, or spread disease.
• Meat, fish, and dairy. These will rot, create terrible odors, and attract raccoons, rats, and stray cats.
• Oils, butter, and grease. These coat your compost materials and block the oxygen that beneficial bacteria need to survive.
• Pet waste, Dog and cat feces, can carry harmful pathogens and parasites that do not belong near your garden.
• Diseased plants, Most backyard compost piles do not get hot enough to kill plant diseases or weed seeds, meaning you will just spread them back onto your lawn later.
Maintenance and Harvesting Your Compost
Once your pile is built, it does not need constant attention, but a little regular maintenance will speed things up dramatically. Think of your compost pile like a living organism that needs water and air to survive.
You want to keep the pile about as damp as a wrung-out sponge. If it gets too dry, the decomposition process will grind to a halt. If it gets too wet, it will start to smell like rotten eggs. If you notice it drying out, give it a quick sprinkle with your garden hose.
Aeration is another key step. Every week or two, use a pitchfork to turn the pile, moving the materials from the outside to the center. This introduces fresh oxygen, which keeps the good bacteria alive and kicking.
If you are using the active hot composting method, keeping the pile damp and turning it regularly will help it reach internal temperatures between 130 and 160 degrees Fahrenheit. This high heat destroys weed seeds and speeds up the timeline, giving you finished compost in just two to three months. If you prefer a hands-off cold composting approach, you can just let it sit, but it will take a year or two to break down.
How do you know when your compost is ready? You will know it is done when it looks like dark, crumbly soil. It should smell clean and earthy, like a forest floor after a fresh rain. None of the original food scraps should be recognizable.
When it is ready, you can spread it directly onto your garden beds, mix it into the soil of your houseplants, or use it as a top dressing to feed your lawn. Your plants will thank you for the homemade organic boost.
Sources:
1. Reencle Food Waste Statistics
https://reencle.co/blogs/news/food-waste-statistics-2026
2. EPA United States 2030 Food Loss and Waste Reduction Goal
https://www.epa.gov/sustainable-management-food/united-states-2030-food-loss-and-waste-reduction-goal
3. The Greenway Foundation Ultimate Guide to Composting
https://thegreenwayfoundation.org/blog/the-ultimate-guide-to-composting-what-why-and-how/
.png)